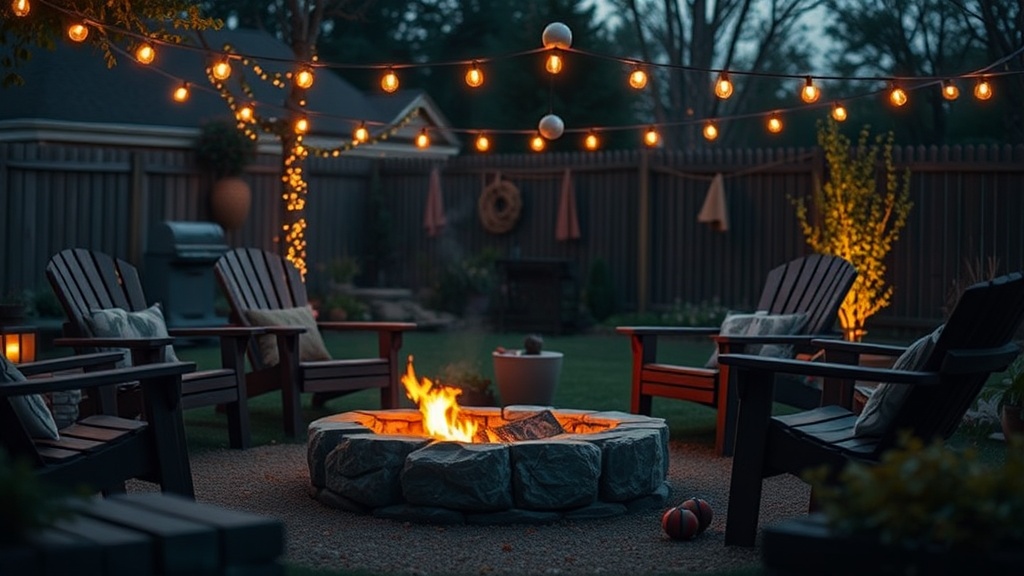
Build a Perfect Backyard Fire Pit for Abitibi Evenings

Most people think a fire pit is just a metal ring you buy at a hardware store and drop in the grass. That's a mistake that ends in scorched lawns and smoke-filled patios. Building a permanent, safe, and efficient fire pit in the Abitibi region requires more than just a pile of rocks; it requires an understanding of our local soil, wind patterns, and the specific way wood burns in our humid summers. This guide breaks down the exact steps to build a stone fire pit that stays functional for decades.
How Much Does a Backyard Fire Pit Cost to Build?
A DIY stone fire pit in the Abitibi region typically costs between $200 and $800 depending on the quality of your stone. If you choose basic pressure-treated timber or cheap stones from a big-box store, you'll stay on the lower end. However, if you invest in high-quality granite or heavy basalt—which looks much better against our local scenery—the price goes up. You aren't just buying materials; you're buying a permanent fixture for your property.
Here is a breakdown of the typical costs you'll encounter:
| Material/Task | Low End (Budget) | High End (Premium) |
|---|---|---|
| Stone/Pavers | $100 (Basic Concrete) | $500+ (Natural Stone) |
| Base Material (Gravel/Sand) | $40 | $120 |
| Tools (Shovel, Level, etc.) | $0 (Rent/Own) | $150 (New/Pro Grade) |
| Fire Ring (Metal Insert) | $30 | $200 |
Don't forget to factor in the cost of your fuel. A good bag of seasoned hardwood from a local supplier will cost more than that cheap bag of kindling you find at the grocery store. It's worth the extra few dollars for the smell alone.
What Type of Stone is Best for a Fire Pit?
Natural stone or heavy-duty concrete pavers are the best choices because they can handle the intense heat cycles common in Northern Quebec. You want something that won't crack or explode when the temperature shifts rapidly—a real issue during our sudden summer thunderstorms. Avoid using river rocks or smooth stones found in local creek beds; these often contain trapped moisture that can expand and cause the stone to shatter under heat.
When selecting your materials, keep these three categories in mind:
- Concrete Pavers: Very affordable and easy to find at stores like Canadian Tire. They are consistent in shape, making the build much faster.
- Natural Granite: Extremely durable and looks much more professional. It blends into the Abitibi landscape perfectly.
- Fire Bricks: These are the gold standard for the inner lining. They are designed specifically to withstand high temperatures without degrading.
I've seen too many people try to use regular bricks for the inner ring. That's a recipe for a mess. Always use a dedicated metal fire ring or fire-rated bricks for the interior. It protects the structural integrity of your outer stone wall.
How Do You Build a Fire Pit Step-by-Step?
Building a fire pit requires a solid foundation of gravel and sand to prevent the structure from shifting or sinking into the soft Quebec soil. If you skip the base, your fire pit will be crooked within two seasons. Follow these steps to ensure it stays level and safe.
Step 1: Site Selection and Clearing
Pick a spot that is at least 10 to 15 feet away from any structures, low-hanging branches, or wooden fences. In our part of the world, wind can pick up speed unexpectedly. You don't want a stray ember landing on your deck. Use a shovel to clear the grass and about 6 inches of topsoil. You need to get down to the firm earth.
Step 2: The Foundation
Fill the excavated area with roughly 3 inches of crushed stone or gravel. This provides drainage and a stable base. Use a level to make sure the ground is perfectly flat. If the base isn't level, your stones will eventually slide or lean. It's a tedious part of the job, but it's the most important. (Trust me, I've seen the crooked ones, and they look terrible.)
Step 3: Laying the First Course
Place your first layer of stones around the perimeter of your gravel base. This is your most important layer. If this layer is off, the whole thing is ruined. Use a rubber mallet to tap the stones into place. Ensure the metal fire ring fits snugly within this circle. If you're using a ring, place it in the center now to check the fit.
Step 3: Building the Walls
Stack your stones in a "running bond" pattern—this means the joints of one layer should not line up with the joints of the layer below. This adds structural strength. As you go up, keep checking the level of the ring and the stones. If you're using concrete pavers, you might want to add a bit of construction adhesive between layers for stability.
Step 4: The Finishing Touches
Once you reach your desired height, fill the gaps between the stones with fine sand or smaller pebbles. This prevents the stones from shifting. If you want to get fancy, you can add a layer of decorative gravel around the outside of the structure to blend it into your yard. This is a great way to make it look like a permanent part of your landscape rather than a temporary project.
For more information on fire safety and outdoor-related regulations, you can check the National Fire Protection Association guidelines. It's better to be safe than sorry when dealing with open flames near your home.
Why Does Airflow Matter for Your Fire?
Proper airflow is the difference between a roaring, pleasant fire and a smoky, frustrating mess. If your pit is too tight or the stones are packed too closely, the fire will struggle to breathe. This results in more smoke, which is the last thing you want when you're trying to enjoy a quiet evening. A well-built pit allows oxygen to reach the base of the fire, keeping the combustion steady and clean.
A common mistake is building the walls too high without providing enough space for air to enter. If you find your fire is constantly producing thick, black smoke, your pit is likely suffocating. You can fix this by adding small gaps in the stone pattern or ensuring your metal ring has enough ventilation holes. It's a small detail that makes a massive difference in how much you'll actually use the pit.
When you're out enjoying the evening, you'll want to be thinking about the conversation, not the smoke hitting your eyes. If you're planning a larger gathering, remember that a larger fire pit provides more heat but also requires more airflow management. It's a balance.
After a long day of building, you might want to head out and enjoy the view. If you're looking for inspiration on where to enjoy the outdoors in our region, check out my post on the best picnic spots for a sunset in the Abitibi. It's a great way to see how different outdoor setups can change the vibe of a location.
One thing to keep in mind: the weather here can turn fast. Always have a plan for when the temperature drops or the rain starts. A fire pit is a great tool, but it won't keep you warm if the wind is blowing at 40 km/h. Invest in some good outdoor gear or a high-quality fire-resistant blanket to stay comfortable while the embers glow.
Steps
- 1
Select a Safe Location
- 2
Clear the Ground and Level it
- 3
Lay a Gravel Base
- 4
Arrange Your Stones and Add a Metal Ring